Have you wanted to transfer your old tape recordings to mp3? If so this simple step by step guide should help you do just that.
What you’ll need:-
- You’ll require a tape deck (bit hard to do it without one!)
- An audio lead to connect the output of your tape deck to your pc
- Some MP3 recording software
I am going to assume that you have a tape deck with phono sockets (red & white) on the rear for the audio lead to connect to. Any standard separate tape deck will or should have these.
Time for an audio lead now to connect together the pc and tape deck. You can buy these from lots of places such as ebay or even make your own. Maplins also stock this type of cable and it will cost you around £5 from there (see pic below).
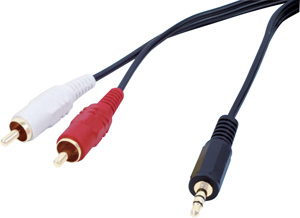
This is the audio cable you will require.
It is a stereo 3.5mm to RCA phono cable.
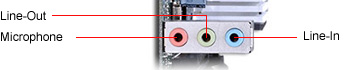
Once this cable is in the back of the tape deck it will need to be connected to the “Line-In” socket on the pc’s soundcard. This will be next to where your speakers connect on the back of your pc. The Line-In is normally the “Blue” socket (see pic below).
Note that if you are using a laptop, some of these do not have the blue line in, they will only have the pink microphone input, if that is the case for your machine, then use this input.
Ok so you have your tape deck connected to your pc, time for some recording software. There is lots of this about and some very expensive. It’s up to you what software you use but here we are going to use a “Free” program, as we all like free don’t we.
The program is called MP3 Recorder and you can download a copy of it by clicking the link below. It’s worth noting that the newer version of this program is Shareware and not free. You will be asked if you wish to upgrade the fist time you run the program, just click “No”
Click Here To Download MP3 Recorder
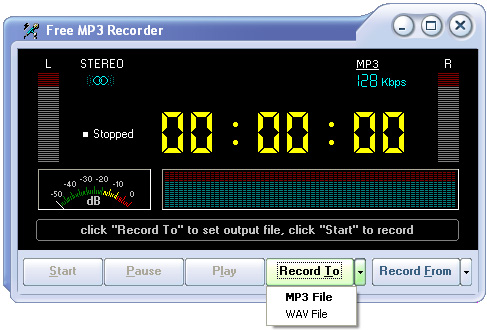
Once downloaded and installed just follow the steps below and you should be recording audio onto your pc within 10 minutes. This is the screen you will see once you open the program after installation.
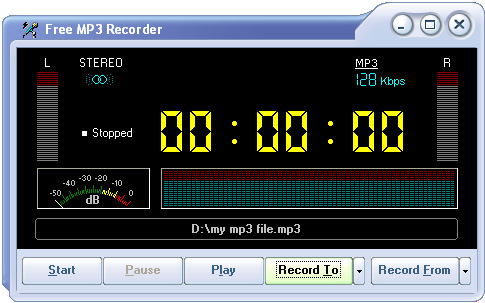
The first thing that needs to be done is to tell the program where the audio source to record is.
Click on the “Record From” Button.
You should then see a screen similar to this in the pic below.
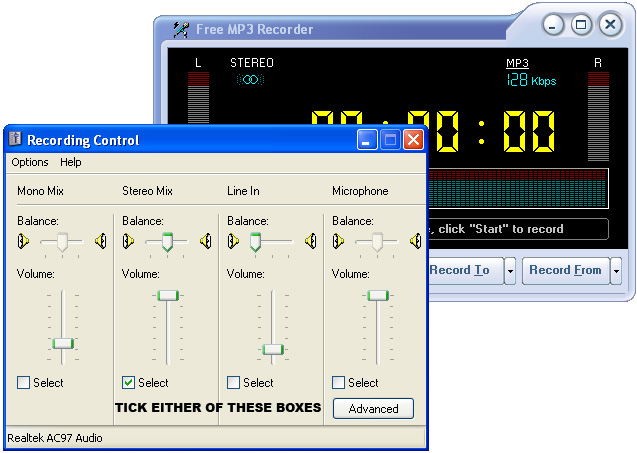
On the recording control screen tick the Line-In box.
This will tell the program to record from the line input only.
If you tick the Stereo Mix box then what you hear on your speakers will be recorded, that includes all the little windows sounds too, not to mention Facebook messenger the good old “error sound” windows makes etc…
Once you have told the program where the audio is coming from, you then need to set the bitrate for your MP3 recording.
The program is preset to 128 kbps which should be fine as a minimum. If you click on the “MP3” letters in the top right you will see the options available. 128 kbps should be the lowest setting you select. The higher the setting the better the quality, but larger the file.
A setting of 192 kbps will give all round good quality and produce files which are of a reasonable size.

If you click on the little arrow next to “Record To” you then have the option to select MP3 or WAV.
Make sure you select MP3 as WAV is not compressed and file sizes will be VERY large.
MP3 is the default for the program.
Click on the “Record To” button and select where you want to save the file you’re about to record and what you want to call it eg My Documents and call the file My Recording No.1.
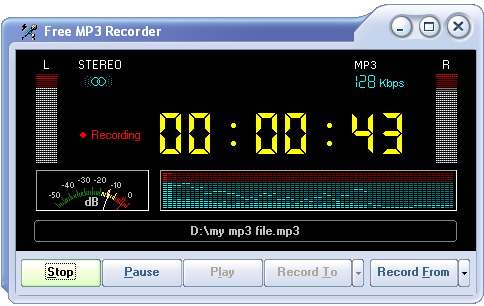
Click on the “Start” button on the left to start recording. You should then see a screen like this below.
Keep an eye on the audio recording level. If this is too loud then your recording will distort and not sound very good. The little meter on the left of the screen should really speak for itself.
If your audio meter is always in the red then you will need to lower the input level. To do this click on the “Record From” button and lower the level of the slider next to your selected input to achieve the required level. Don’t forget that this level will vary depending on the source volume.
You should now be able to record any audio from a tape deck or any other source you connect to your pc in this way. I hope this guide has been informative and easy to follow. If you need any further help with this or any other matters then please don’t hesitate to ask in our forum.
Also if you know of any other easy to use “Free” software then please let everyone else know in the forum.